
Adult toy prototyping takes 4 to 12 weeks and costs between 200and200and15,000+ depending on the method you choose. Most founders start with a 200−200−800 hand-poured silicone prototype to validate shape and feel before investing in production molds.
Marcus learned this the hard way. In early 2024, he sketched a curved vibrator design he was convinced would disrupt the market. Instead of building a functional prototype first, he paid a mold maker $8,000 for hardened steel tooling.
The first cast came back with a structural flaw in the internal cavity. The motor housing wall was too thin. The mold was unusable. Eight thousand dollars gone in a single afternoon.
You’re reading this because you want to avoid that mistake. You want to know exactly which prototyping method matches your budget, how long each phase takes, and when to stop iterating and commit to production tooling.
This guide breaks down the five-phase prototyping process, compares five methods from 50DIYprintsto50DIYprintsto15,000 steel molds, and gives you a validation checklist that prevents expensive surprises.
Here is what you will learn. We will cover the exact timeline for each prototyping phase. We will compare costs across DIY, mid-fidelity, and production-grade methods. We will explain material selection for body-safe prototypes. And we will show you how smart toys add complexity most guides ignore.
Key Takeaways
- Prototyping costs range from 200(DIYsilicone)to200(DIYsilicone)to15,000+ (steel production molds).
- The 5-phase process spans concept, CAD, 3D print, functional cast, and pre-production validation.
- 3D printing is fastest (2-3 days) but lowest fidelity; soft tooling (2K−2K−8K) best balances cost and realism.
- Smart toys require 2-4 extra weeks for electronics integration and waterproof testing.
- Most successful founders complete 2-3 prototype iterations before design freeze.
What Is Adult Toy Prototyping?
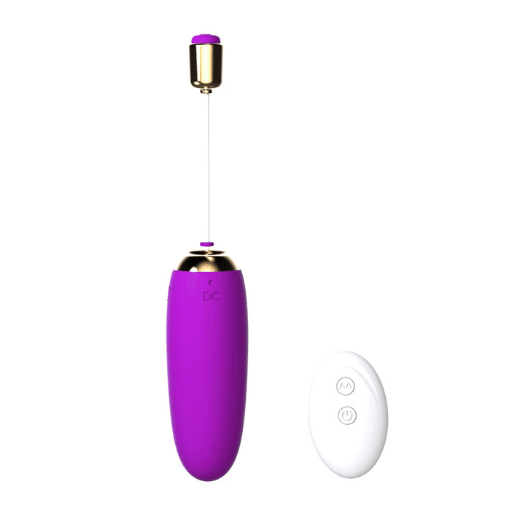
Adult toy prototyping is the process of creating functional or visual samples of a product design before committing to full-scale production tooling. It lets you test ergonomics, material behavior, and manufacturing feasibility without risking tens of thousands of dollars on unproven molds.
A prototype isn’t the same as a production sample. A prototype proves the concept. A production sample (also called a golden sample) proves the manufacturing process. You need both.
Skipping the prototype and jumping straight to production tooling is how founders burn through capital.
Prototyping reduces risk in three ways. First, it catches design flaws before they’re locked into steel. Second, it gives you something tangible to test with users. Third, it generates data that manufacturers need to quote production accurately.
Without a prototype, you’re asking a factory to estimate costs based on a sketch. That estimate will be wrong.
If you want the full picture of how prototyping fits into the broader manufacturing pipeline, see our complete guide to custom adult toy manufacturing.
The 5-Phase Prototyping Process
Most guides dump a vague “design to production” timeline on you. That doesn’t help with cash flow planning. Here’s exactly what happens in each phase and how long it takes.
Phase 1: Concept and Sketch (Week 1)
Start with rough sketches and dimensional notes. Define the target user, price point, and core functionality. A 30vibratorhasdifferentmaterialandmotorrequirementsthana30vibratorhasdifferentmaterialandmotorrequirementsthana200 premium wand.
Create a design brief. List must-have features, nice-to-have features, and constraints. Constraints include maximum dimensions, battery type, waterproof rating, and target Shore A hardness. This brief becomes your north star through iteration.
Phase 1 deliverable: Design brief with sketches and specifications.
Phase 2: 3D CAD Design (Weeks 1-2)
Transfer sketches into 3D CAD software. Fusion 360, Blender, and TinkerCAD are common choices. For simple rotational shapes, free tools like Dildo-Sculptor speed up early exploration.
CAD lets you verify internal clearances, wall thickness, and parting lines before any physical model exists. A common mistake is designing an exterior shape first and discovering the internal motor cavity has no room. CAD exposes this in hours instead of weeks.
Phase 2 deliverable: 3D model files (STL or STEP format) and technical drawings.
Phase 3: Looks-Like and Works-Like Models (Weeks 2-4)
This is where physical prototyping begins. You have two parallel tracks.
The looks-like model tests aesthetics and ergonomics. Print the exterior shell on an SLA 3D printer at 50-micron resolution. Sand it smooth. Hold it.
Does it feel right in the hand? Is the button placement intuitive? This model doesn’t function, but it answers critical user-experience questions.
The work-like model tests mechanics. Use basic electronics, off-the-shelf motors, and temporary housings to validate vibration patterns, battery life, and control logic. It looks ugly, but it proves the tech works.
Elena used this dual-track approach in 2025. She printed four exterior variations of a G-spot vibrator in two days. She tested them with five users. One shape scored significantly higher on comfort.
She then built a works-like model with that shape and discovered the motor mounting needed reinforcement. Total cost: $340. Time: three weeks. She caught both issues before touching a silicone mold.
Phase 3 deliverable: Validated exterior form and functional mechanics proof.
Phase 4: Functional Silicone Prototypes (Weeks 4-8)
Now you create prototypes that look and feel like the final product. This is where most founders realize their CAD design needs adjustment.
For one-off or small batches, build a silicone mold around your 3D-printed master. Pour platinum-cure silicone at your target Shore A hardness. Demold, trim flash, and test.
Does the silicone tear at thin walls? Does the surface finish match expectations? Does the motor fit the cavity now that real material thickness is involved?
Expect to iterate 2-3 times at this stage. Each iteration teaches something.
Maybe the parting line is visible in a bad spot. Maybe the silicone is too soft and the toy collapses during use. Maybe the color pigment reacts with the catalyst. These are cheap lessons when you’re hand-pouring. They’re bankruptcy-level lessons when you discover them in steel tooling.
Phase 4 deliverable: 2-3 functional silicone prototypes that match target specifications.
Phase 5: Pre-Production Validation (Weeks 8-12)
If your silicone prototypes perform well, you move to pre-production tooling. This means aluminum or soft steel molds that produce 500-5,000 units. These molds cost 40-60% less than hardened steel and let you validate the full manufacturing process.
Use pre-production samples for compliance testing. Submit them for CE marking, FDA material verification, and biocompatibility assessment. Start certification now, not after production launch.
Testing takes 4-8 weeks, and you can’t sell in most markets without it.
For a deeper dive into certification timelines, read our guide to adult toy certifications explained.
Phase 5 deliverable: Pre-production samples, compliance test reports, and production-ready documentation.
Prototyping Methods Compared
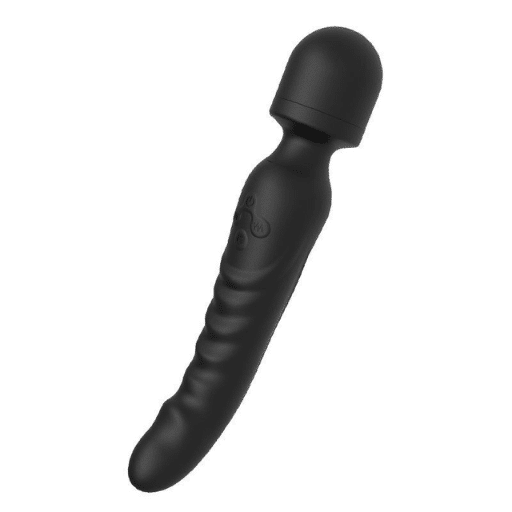
Not every project needs a $15,000 steel mold. The right method depends on your budget, timeline, and what you need to learn. Here are the five methods ranked from lowest to highest investment.
Method 1: 3D Printing (Rapid, 50−50−500)
3D printing creates physical models from CAD files in hours. SLA resin printers produce the smoothest surfaces, which is critical if you plan to make a silicone mold from the print.
Best for: Early form exploration, ergonomic testing, and creating masters for silicone molds.
Limitations: Printed materials aren’t body-safe. You cannot use a 3D-printed toy for intimate testing. Prints also lack the flexibility of silicone, so they cannot validate material feel.
Typical cost: 50−50−200 for DIY prints; 200−200−500 for professional services.
Method 2: Hand-Poured Silicone Molds (Artisan, 200−200−800)
This is the sweet spot for most founders. Print a master and build a containment box. Pour platinum-cure silicone over it. After curing, split the mold and cast your first functional prototype.
Best for: Testing material feel, shape validation, and creating 1-10 samples for user feedback.
Limitations: Each cast takes manual effort. Surface finish depends on your skill level. Mold lifespan is 15-25 casts before degradation.
Typical cost: 100−100−300 for materials and tools; 200−200−800 if outsourced to a prototype shop.
Method 3: RTV Silicone Casting (Mid-Fidelity, 500−500−2,000)
Room Temperature Vulcanizing (RTV) silicone molds are more durable than hand-poured versions. A prototype shop creates a professional mold from your master and casts 10-50 units in production-grade silicone.
Best for: Generating multiple samples for focus groups, influencer seeding, or crowdfunding campaigns.
Limitations: Higher per-unit cost than production molding. Not economical beyond 100 units.
Typical cost: 500−500−1,500 for mold creation; 10−10−30 per cast.
Method 4: Soft Tooling / Aluminum Molds (Pre-Production, 2,000−2,000−8,000)
Aluminum or soft steel molds bridge the gap between prototyping and mass production. They produce parts with the same process as final production, but the tooling wears faster.
Best for: Final design validation, compliance testing, and small production runs of 500-5,000 units.
Limitations: Higher upfront cost. Not suitable for high-volume production.
Typical cost: 2,000−2,000−8,000 depending on complexity.
Method 5: Steel Production Molds (Final, 4,000−4,000−15,000+)
Hardened steel molds are the industry standard for high-volume production. They last millions of cycles and deliver consistent, tight-tolerance parts.
Best for: Mass production after design is frozen and validated.
Limitations: Expensive to modify. Any design change requires machining the steel or building a new mold.
Typical cost: 4,000−4,000−15,000+ for single-cavity molds; multi-cavity molds cost significantly more.
Want a precise quote for your prototype? Joyflick offers free design consultations to match your concept with the right prototyping method. Contact our team to discuss your project.
| Method | Cost | Timeline | Best For | Output Quantity |
|---|---|---|---|---|
| 3D Printing | 50−50−500 | 1-3 days | Form exploration | 1-5 units |
| Hand-Poured Silicone | 200−200−800 | 1-2 weeks | Material feel test | 1-10 units |
| RTV Casting | 500−500−2,000 | 2-3 weeks | Focus group samples | 10-50 units |
| Soft Tooling | 2,000−2,000−8,000 | 4-6 weeks | Pre-production validation | 500-5,000 units |
| Steel Molds | 4,000−4,000−15,000+ | 6-10 weeks | Mass production | Unlimited |
For a full cost breakdown across the entire manufacturing process, see our guide to adult toy manufacturing costs.
Materials for Prototyping
Material selection matters even at the prototype stage. The silicone you use for testing should match the production material as closely as possible. Otherwise, you are validating the wrong product.
Platinum-Cure Silicone
Platinum-cure silicone is the gold standard for body-safe toys. It is non-toxic, odorless, and stable over time. For prototypes, use the same Shore A hardness you plan for production.
Shore A hardness guide:
- 5-10A: Very soft, squishy, gelatin-like feel
- 20-30A: Firm but flexible, common for standard vibrators
- 40-50A: Rigid, often used for handles and bases
Dual-density toys use a firm inner core (30-40A) with a soft outer layer (5-10A). Prototyping dual-density requires pouring two layers with precise timing. Practice this on simple shapes before attempting complex geometries.
TPE and TPR
Thermoplastic elastomers are cheaper than silicone and easier to process. However, they’re porous and less durable. If your production target is TPE, prototype in TPE. If your production target is silicone, don’t prototype in TPE. The feel and behavior are completely different.
ABS Plastic
ABS is used for rigid components like battery housings, control panels, and charging ports. Prototype these with SLA resin prints or CNC-machined blocks.
Urethane Resins
Urethane casting resins mimic production plastics for mechanical testing. They are useful for works-like models but not for body-contact surfaces.
Body-Safety Considerations
Even prototypes intended for user testing must be body-safe. Use platinum-cure silicone with cosmetic-grade pigments. Avoid tin-cure silicone, which can leach toxins. If you are unsure about a material, do not put it inside a human body.
Cost Breakdown by Budget Level
Prototyping costs scale with fidelity. Here is what you get at three budget tiers.
DIY Hobbyist (200−200−1,000)
| Item | Cost |
|---|---|
| 3D printer filament or resin | 50−50−150 |
| Platinum-cure silicone (1-2 kg) | 80−80−200 |
| Mold release and tools | 50−50−100 |
| Pigments and additives | 30−30−80 |
| Basic electronics (motor, battery) | 40−40−150 |
| Total | 250−250−680 |
This tier is ideal for makers who want hands-on experience. You will learn more about material behavior by pouring silicone yourself than by reading any guide.
Startup Validation (1,500−1,500−5,000)
| Item | Cost |
|---|---|
| Professional 3D modeling (if outsourced) | 300−300−800 |
| SLA printing service (high-resolution master) | 150−150−400 |
| RTV mold and 10-20 casts | 500−500−1,500 |
| Electronics prototyping (PCB, motor, battery) | 300−300−800 |
| Design iteration (second round) | 300−300−800 |
| Total | 1,550−1,550−4,300 |
This tier matches most founders who need functional prototypes for investor pitches, manufacturer quotes, or crowdfunding campaigns. It delivers professional-quality samples without the cost of production tooling.
Professional Pre-Production (5,000−5,000−15,000)
| Item | Cost |
|---|---|
| Full CAD and DFM review | 500−500−1,500 |
| Soft tooling (aluminum mold) | 2,000−2,000−6,000 |
| 50-100 pre-production samples | 500−500−1,500 |
| Compliance testing (CE, material safety) | 1,000−1,000−3,000 |
| Design refinement | 500−500−1,500 |
| Total | 4,500−4,500−13,500 |
This tier is for brands that have validated demand and need production-ready samples for large retailer meetings or regulatory approval.
Timeline: How Long Does Each Method Take?
Time is money in prototyping. Here is a realistic week-by-week comparison.
| Phase | 3D Print | Hand-Poured | RTV Casting | Soft Tooling | Steel Molds |
|---|---|---|---|---|---|
| CAD Design | 1-2 weeks | 1-2 weeks | 1-2 weeks | 1-2 weeks | 1-2 weeks |
| Master Creation | 1-3 days | 1-3 days | 1-3 days | 1-2 weeks | 2-3 weeks |
| Mold/Cast | N/A | 3-5 days | 1-2 weeks | 3-4 weeks | 4-6 weeks |
| First Sample | 1-3 days | 1-2 weeks | 2-3 weeks | 6-8 weeks | 8-12 weeks |
| Iteration | 1-2 days | 3-5 days | 1-2 weeks | 2-3 weeks | 4-6 weeks |
| Total | 1-2 weeks | 2-4 weeks | 4-6 weeks | 10-14 weeks | 14-20 weeks |
Common delay factors:
- Design changes after first sample: adds 1-3 weeks per iteration
- Shipping samples from overseas prototype shops: adds 1-2 weeks
- Electronics debugging: adds 2-4 weeks for smart toys
- Compliance testing: adds 4-8 weeks (run parallel with final iterations)
To understand how prototyping fits into your full launch timeline, see our comparison of OEM vs ODM manufacturing models.
Smart Toy Prototyping: Electronics Integration
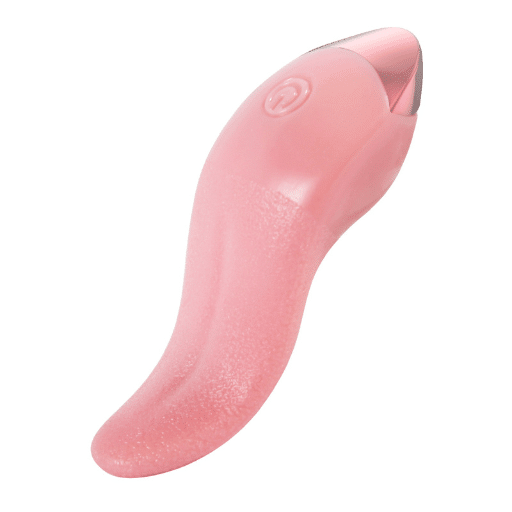
Smart toys add a layer of complexity that purely mechanical toys avoid. App connectivity, variable vibration patterns, and biometric sensors require electronics prototyping alongside silicone work.
PCB Design and Motor Testing
The printed circuit board controls everything. Prototype the PCB on a breadboard first. Test motor drivers, battery management, and Bluetooth modules.
Only after the electronics work reliably should you design a compact PCB that fits inside the toy housing.
Battery Compartment Design
Batteries are bulky. A rechargeable lithium-ion cell adds 10-20 grams and requires a charging port. Design the housing around the battery, not the other way around. Many founders design a sleek exterior and discover the battery doesn’t fit.
Leo learned this the hard way. His team spent six weeks perfecting the silicone housing for a smart kegel trainer. When they tried to install the PCB and battery, the compartment was 3 millimeters too narrow.
The housing had to be redesigned from scratch. That mistake cost $4,200 in rework and delayed their launch by six weeks.
Waterproofing Validation
Smart toys must keep electronics dry. Prototype gaskets, O-rings, and sealed charging ports. Test by submerging the prototype for 30 minutes at the claimed depth. If water enters, redesign the seal before production.
Smart toy prototyping adds 2-4 weeks and 800−800−3,000 to a standard mechanical prototype budget. Plan for it.
Common Prototyping Mistakes
Experience is the name everyone gives to their mistakes. Here are the most expensive ones.
- Skipping the works-like model. A beautiful exterior means nothing if the motor rattles or the battery dies in ten minutes. Test mechanics before aesthetics.
- Using non-production materials for final validation. A TPE prototype will feel different from a silicone production unit. Validate with the final material.
- Ignoring parting lines and seam placement. Mold parting lines create visible seams. Place them where users will not feel or see them. This is hard to fix after tooling is cut.
- Underestimating mold shrinkage. Silicone shrinks 1-3% during curing. Your CAD model must account for this, or the final toy will be smaller than intended.
- Prototyping at one hardness, producing at another. Shore A hardness dramatically affects feel. A 10A prototype feels nothing like a 30A production unit. Match your prototype hardness to production specs.
- Waiting too long to start compliance testing. CE marking and material safety tests take 4-8 weeks. Start them with your pre-production samples, not after you have already ordered production molds.
Prototype Validation Checklist
Use this checklist before you approve any prototype for production tooling.
Function
- Motor operates at the target speed and pattern
- Battery lasts for the claimed duration
- Controls respond correctly
- Charging works reliably
Fit
- Dimensions match CAD within tolerance
- All components assemble without force
- Gaskets and seals compress properly
Feel
- Surface texture matches target
- Shore A hardness is correct
- Weight distribution is balanced
- Button placement is intuitive
Safety
- Materials are body-safe and certified
- No sharp edges or pinch points
- Waterproof rating validated
- Temperature stays within safe range during use
Manufacturability
- Wall thickness is consistent
- Parting lines are in acceptable locations
- Mold release is feasible
- Production yield will be above 90%
Do not approve production tooling until every item is checked. One unchecked box is how $8,000 molds become paperweights.
From Prototype to Production
Approving the prototype is not the finish line. It is the starting gate for production.
First, create a golden sample. This is the perfect unit that becomes the quality benchmark for every production batch. Photograph it from every angle.
Document dimensions, weight, hardness, and color values. The factory references this sample for the life of the product.
Second, freeze the design. After tooling begins, changes become exponentially more expensive. A CAD tweak that takes ten minutes can cost 500−500−2,000 to implement in steel.
Third, commission production tooling. Submit your golden sample, CAD files, and design specification to the mold maker. Request first-article samples from the production mold before authorizing full production.
Fourth, plan your first production order. If you’re unsure about demand, start with a low MOQ.
Joyflick offers low MOQ adult toy manufacturing starting at 300 units. This lets you test market response without committing to thousands of units.
For help navigating the transition from prototype to production, read our guide on how to find a reliable adult toy manufacturer.
Conclusion
Adult toy prototyping isn’t mysterious. It’s a sequence of validated steps with known costs and timelines. Start with a 3D-printed master. Pour a hand-molded silicone prototype to test feel.
Iterate 2-3 times. Move to soft tooling only after the design is frozen. And never, under any circumstances, order steel production molds for an untested design.
The global adult toy market will exceed $59 billion by 2034. New brands enter every month.
The ones that survive aren’t the ones with the best initial idea. They’re the ones who validated that idea through rigorous prototyping before betting their capital on production.
Ready to turn your prototype into a production reality? Joyflick’s R&D team supports full prototyping-to-manufacturing pipelines with ISO-certified production, 50+ patented technologies, and low MOQs starting at 300 units. Contact our team for a free design consultation and prototyping quote.